Introduction to Changing a Car Tyre
Why Every Driver Should Know How to Change a Tyre
Changing a car tyre is a fundamental skill that every driver should possess. It not only empowers you to handle a common roadside emergency but also saves time and the expense of waiting for roadside assistance.
Understanding how to change a tyre ensures that you can get back on the road quickly and safely, especially in areas with poor mobile phone reception or during late hours when help might not be readily available.
Tools Required for Changing a Tyre
To successfully change a tyre, you need the right tools. The essential toolkit includes a jack, a lug wrench, and a fully inflated spare tyre.
Additionally, having wheel wedges, a tyre pressure gauge, and a tyre block or chock to secure the vehicle can enhance safety.
Keeping these tools in your vehicle ensures you’re prepared for any tyre-related emergencies.

Safety Precautions Before Starting the Process
Safety is paramount when changing a tyre. Before beginning, ensure the car is parked on a flat, stable surface away from oncoming traffic.
Always turn on your hazard lights to alert other drivers. Wearing reflective vests and using safety cones or warning triangles can further enhance your visibility and safety, particularly under low-light conditions.
Preparing to Change the Tyre
Locating Your Spare Tyre and Tools
The spare tyre and tools are usually located in the boot under the floor mat, along with the jack and lug wrench. Familiarise yourself with their locations and how to access them swiftly and efficiently.
It’s advisable to check the condition of the spare tyre periodically to ensure it’s properly inflated and suitable for use.
Ensuring Your Car is Parked Safely and Securely
Before attempting to change the tyre, make sure your car is parked in a safe, secure location. It should be well away from traffic and on level ground to prevent the car from rolling.
If you’re on a busy road, try to move to a quieter area if possible, or at least ensure that passing vehicles can clearly see you.
Applying the Parking Brake and Placing Wheel Wedges
Applying the parking brake is the first step once you’ve parked your car safely. This brake helps keep the vehicle stationary during the tyre change.
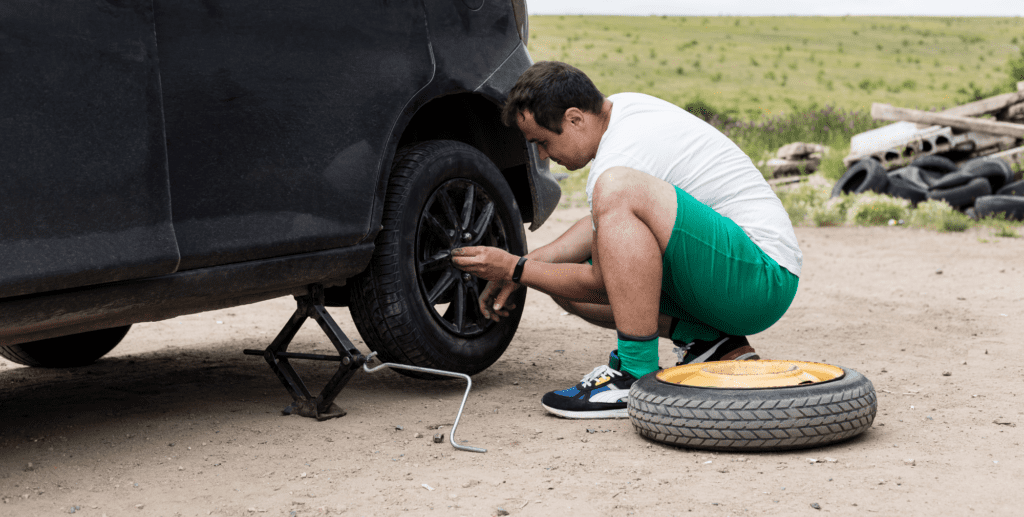
For added security, place wheel wedges against the tyres opposite to the one you’re changing. For example, if you’re changing a front tyre, place the wedges behind the rear tyres and vice versa. This prevents the car from rolling.
Removing the Wheel Cover and Loosening the Nuts
How to Remove the Hubcap or Wheel Cover
To access the lug nuts, you may first need to remove the hubcap or wheel cover. This is often done using the flat end of your lug wrench or a screwdriver, depending on your car’s design.
Insert the tool between the edge of the hubcap and the rim, and gently pry it off. Make sure to do this gently to avoid damaging the hubcap.
Loosening the Lug Nuts Before Lifting the Car
Before you lift the car with the jack, it’s crucial to loosen the lug nuts. This should be done while the tyre is still on the ground to prevent the wheel from spinning. Use the lug wrench to turn the nuts counter clockwise.
Do not remove them completely at this stage—just break their resistance. It is typically easier to use your foot or all your body weight to turn the wrench if the nuts are very tight.
The Correct Order and Technique for Loosening Lug Nuts
Loosening the lug nuts in a cross pattern is a recommended technique as it helps maintain the balance of the wheel and prevents it from warping. Start with one nut, then move to the one directly opposite it. Continue this pattern until all nuts are loosened. This method ensures even pressure distribution across the wheel face.
Lifting the Vehicle
Placing the Jack in the Correct Position Under the Vehicle
Identifying the right place to position the jack is critical for safety. Most vehicles have specific points along the frame where the jack is intended to go; these are typically marked with a notch or a sign.
Placing the jack in the wrong position can damage your vehicle and poses a serious safety hazard. Always refer to your vehicle’s owner’s manual for guidance on jack placement.
Raising the Car Safely
With the jack correctly positioned, raise the vehicle by turning the jack handle clockwise. Make sure the jack lifts the car smoothly and steadily.
Keep raising until the tyre is sufficiently off the ground to remove it and fit the spare. It’s important to ensure the car is high enough that the new tyre will not drag on the ground when installed.
Ensuring Stability Before Proceeding
Once the car is lifted, double-check the stability of the jack and ensure it is securely supporting the vehicle before proceeding.
Never place any part of your body under the vehicle while it is supported only by the jack. If the car seems unstable, lower it back down safely and reposition the jack before lifting it again.
Replacing the Tyre
Removing the Lug Nuts and Tyre
With the vehicle securely raised and stable, you can now fully remove the lug nuts. Keep them in a safe place—such as in your hubcap or a small container—so you don’t lose any.
Once the lug nuts are removed, carefully pull the tyre straight towards yourself to remove it from the hub. It might be heavy, so be sure to use both hands and keep your back straight to avoid strain.
Mounting the Spare Tyre on the Hub
To mount the spare tyre, align it with the wheel bolts on the hub. Lift the tyre and slide it onto the hub, ensuring that the bolts fit through the holes in the tyre.
This might require a bit of adjustment as you align everything correctly. Once the spare tyre is on, push it all the way back against the hub.
Hand-tightening the Lug Nuts on the Spare Tyre
Start replacing the lug nuts by hand to secure the spare tyre. Screw each nut back onto the bolts by hand as far as you can to ensure the tyre is held evenly against the hub.
At this stage, avoid using the wrench to ensure the threads are not crossed. Tightening them by hand initially will make it easier to finally secure them with the wrench.
Lowering the Vehicle and Finishing Up
Lowering the Vehicle Carefully Off the Jack
To lower the vehicle, turn the jack handle counter clockwise, but keep the process controlled and steady. Ensure the tyre gently touches the ground and the vehicle’s full weight is back on all tyres before completely removing the jack. Double-check that the jack is free of resistance before pulling it out from under the vehicle.
Tightening the Lug Nuts with a Wrench
Once the vehicle is on the ground, use the lug wrench to tighten the lug nuts securely. Again, follow the cross pattern method: tighten one nut, then move to the one opposite it.
This ensures the tyre is balanced and the pressure is evenly distributed across the surface. Tighten the nuts as much as you can to prevent the tyre from wobbling or coming loose.
Replacing the Hubcap and Storing the Tools
If your vehicle uses a hubcap, replace it by aligning it with the rim and popping it back into place. Make sure it fits securely so it doesn’t come off while driving.
Finally, store all your tools and the flat tyre back in their respective places. Ensure the flat tyre is secured within the vehicle to prevent it from rolling or causing any damage while driving.
Changing Your Car Tyre in 11 Steps Summary
- Prepare the Necessary Tools: Gather all tools needed, including a jack, lug wrench, and spare tyre.
- Ensure Safety: Park your car on a flat, stable surface away from traffic and turn on hazard lights.
- Locate the Spare Tyre and Tools: Find the spare tyre, jack, and lug wrench typically stored in the boot.
- Apply the Parking Brake: Engage the parking brake to secure the car.
- Place Wheel Wedges: Use wheel wedges against the tyres not being changed to prevent the car from rolling.
- Remove the Wheel Cover: Pry off the hubcap or wheel cover with the flat end of your lug wrench.
- Loosen the Lug Nuts: Use the lug wrench to loosen the lug nuts without removing them completely while the tyre is on the ground.
- Position the Jack and Raise the Vehicle: Place the jack under the vehicle at the designated point and lift until the tyre is off the ground.
- Remove the Lug Nuts and Tyre: Remove the lug nuts completely, then pull the tyre off the hub.
- Mount the Spare Tyre: Align the spare tyre with the wheel bolts and push it into place, then hand-tighten the lug nuts.
- Lower the Vehicle and Secure the Tyre: Lower the car carefully, remove the jack, and then tighten the lug nuts fully using the wrench in a cross pattern.
Frequently asked questions
Immediately slow down and pull over to a safe location, away from traffic. Turn on your hazard lights to alert other drivers, and apply the parking brake when parked.
The jacking point is typically indicated in the vehicle’s owner manual and often marked on the vehicle frame near the wheel wells. Always use the designated jacking points to avoid damage to your car or the jack.
Yes, a full-size regular tyre is more durable and allows for normal driving conditions. However, if your vehicle comes with a space-saver spare, it’s only meant for temporary use to get you to a tyre repair shop.
Lug nuts should be tightened to the manufacturer’s recommended torque specification. Over- or under-tightening can lead to wheel damage or the tyre coming loose, respectively.
Changing a tyre on a hill can be dangerous due to the risk of the car rolling. If it’s unavoidable, place wheel wedges against the tyres that are on the ground to prevent movement, but it’s best to find a flatter area if possible.
If your spare tyre is flat, you will need to call for roadside assistance or use a tyre inflator or repair kit if you have one.
Always check the spare tyre’s condition regularly to ensure it is ready for use.
Check your tyre pressure at least once a month and before embarking on long trips. Correct tyre pressure is crucial for safe driving and to ensure your tyres wear evenly.
Tightening lug nuts in a cross pattern ensures the wheel is evenly seated against the brake hub, preventing imbalance, vibrations, and warping of the wheel.
Worn-out tyres significantly reduce your vehicle’s handling and braking efficiency, especially on wet roads, increasing the risk of accidents. They are also more susceptible to blowouts.
Space-saver tyres are not designed for long distances or high speeds. Generally, they should not be used for more than 50-70 miles and not exceed speeds of 50 mph. Always refer to your vehicle’s owner manual for specific recommendations.


